


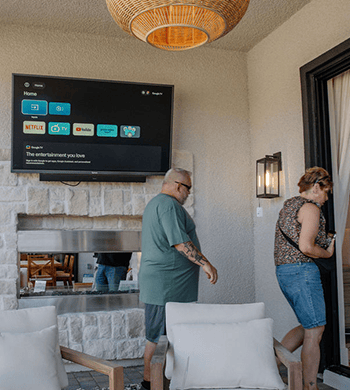

Plan the network, devices, connections, and sound before mounting an outdoor TV. Start with the internet source, how it reaches the patio, the playback device, the screen connection, and the seating area. Check the product page and manual for the selected Sylvox outdoor TV for the ports and wireless features you plan to use. This helps the finished setup deliver a stable connection, accessible controls, and comfortable sound levels.
1. Map the viewing scenario before choosing equipment
Before choosing equipment, decide how the TV will be used. Will viewers mainly use apps on the TV, cast from phones, connect a streaming box, or plug in a game console? Note the distance from the router, walls and exterior materials between the router and TV, available conduit, power location, seating positions, and any limits on evening noise.Then check four parts of the setup:
- Network access: getting a reliable internet connection to the TV or source device.
- Content control: deciding whether apps run on the TV, on an external player, or on a phone that casts.
- Video and control interfaces: carrying picture, sound, and device-control signals through ports such as HDMI.
- Audio coverage: making speech and music intelligible across an open area without sending unnecessary sound toward neighbors.
Address network access first, then confirm how content reaches the screen, which connections each device needs, and where sound should be heard. Planning these parts together helps the finished setup work smoothly.
2. Choose the primary network path and a fallback
For a patio TV, the primary path may be existing Wi-Fi, a mesh node, an outdoor-rated access point, or Ethernet. The right choice depends on distance, obstructions, cable access, and maintenance tolerance—not simply the highest advertised speed.Before mounting, test at the proposed TV position with the doors closed and other household devices active. A phone speed test is useful, but it is not the whole test. Check whether the streaming app starts quickly, maintains playback, and stays stable during the time of day when the patio will be used. Building materials, low-emissivity glass, masonry, metal siding, and the placement of the access point can affect the path differently from an indoor room.If cable access exists, preserve it even when Wi-Fi currently performs well. Conduit, a pull string, or an accessible junction point gives the system a practical upgrade path. Any cable, connector, penetration, or enclosure exposed outdoors must be suitable for the location and installed in accordance with local requirements. A qualified installer or electrician should handle work involving exterior penetrations, mains power, or uncertain code conditions.
3. Decide how content will reach the screen
There are three common playback patterns:
- TV-native apps: fewer external devices and cables, but app availability and software support depend on the exact platform and model.
- External streaming player or set-top box: a consistent interface across TVs, but it adds power, HDMI, weather protection, and remote-control considerations.
- Casting from a phone or tablet: convenient for shared clips and quick handoff, but discovery and control depend on compatible devices, local-network visibility, and software support.
Pick one everyday playback method and keep another available as a fallback. TV-native apps may be convenient, while an accessible HDMI input can support a temporary source. When choosing a Sylvox outdoor TVmodel, check the product page and manual for the apps, connections, and control features you plan to use.If casting is part of the plan, test device discovery and playback before the final cable covers go on. Confirm that the controller and TV can join the same local network and that the controller stays connected from the seating area. If discovery or playback is unstable, consult the Sylvox user manuals and FAQs before changing the hardware.
4. Inventory HDMI, return-channel, and control needs
List every source and audio device, then assign a connection to each one. A streaming player, game console, cable box, and soundbar can use different HDMI inputs. If the sound system uses HDMI ARC or eARC, identify the designated port and confirm support on both ends. ARC/eARC capability, CEC behavior, supported audio formats, and port counts vary by model, so use the selected model manual to confirm the setup.Plan physical access as carefully as the port count. Outdoor TV housings and weather-sealed input compartments can make connections less convenient after mounting. Allow appropriate cable bend radius, strain relief, and room to open the connection area. Avoid trapping consumer adapters or indoor-only streaming devices in a hot, wet, or unventilated location. Follow the device maker's environmental limits.
5. Design audio around people, not the screen
Outdoor sound behaves differently because an open patio has fewer walls and ceilings to reflect it back toward the listeners. Start with the number of seats, their distance from the screen, typical background noise, and the direction sound will travel.The TV’s built-in speakers may be enough for a smaller, partly enclosed patio. On a wider or more open deck, placing the audio source closer to the seating area can make dialogue easier to follow without turning the volume up unnecessarily. If you prefer a TV-mounted solution, consider a weather-ready option such as the Sylvox Elf S2 outdoor soundbar, which supports HDMI ARC and CEC. Before buying, confirm that the connection method and environmental rating suit your selected TV and installation area.
6. Run a full rehearsal before final installation
Before completing the installation, run the entire setup once from the intended TV and seating locations. Connect the TV or source device to the planned network, play the streaming services and content your household normally uses, and test casting from the main seating area if it will be part of the setup. Switch between every planned HDMI source to make sure the picture appears correctly and the audio follows without interruption. Restart the TV, router, source devices, and audio equipment to confirm that they reconnect and operate normally. Once everything works as expected, photograph the port labels and record which cable is assigned to each input before closing the connection covers. This full rehearsal can reveal issues while the equipment is still accessible and provides a useful reference if the setup changes later.
Final takeaway
A smooth outdoor viewing experience starts with planning the whole setup—not just choosing the screen. Before mounting your TV, make sure the network, playback devices, connections, sound, and installation details work together in the actual patio or backyard environment:
- Test the primary network and casting connection from the final TV and seating locations.
- Confirm that every planned source has the correct HDMI input, with ARC or eARC verified if an external audio system is used.
- Plan weather-appropriate cable routing, power access, and audio placement before closing covers or mounting hardware.
- Save cable labels, connection photos, and model information for easier maintenance or future upgrades.
Once these essentials are confirmed, you can choose the Sylvox outdoor TV and audio setup that best fits the space. A complete rehearsal before installation helps reduce later adjustments and makes movie nights, game days, and everyday outdoor viewing easier to enjoy.


Leave a comment